Now, both business have taken off tremendously. Wow! Amazon.com has gone from books to selling almost any legal product that you can think of; and they have Amazon web services where you can rent computer time from their global network.
Now, I like good stories and movies like anyone else, but I’m sure there are many like me who also want to know… so what? What can I learn, and then do with it?
Facebook has become a popular means for businesses to communicate with their customers; so much to the extent that if there’s a politician, they are on Facebook and Twitter. Now, what I see as the pain, the problem is how can the small business owner keep their site up to date, their blog up to date, and still have time to keep Facebook and related social network up to date without duplication, and hopefully with enough variety that they don’t look like everyone else on the playing field.
While WordPress does have plugins where new (and even edited) pages and posts (aka blog entries) automatically post to the various social networks, most of them are very general. For instance, going to the Facebook wall. What if you wanted to make the most of Facebook? Blogs go to Notes, News goes to a News tab, and wouldn’t it be nice if you could have a fill-in-the-blanks contact form on Facebook where people can contact you yet another way?
A few weeks ago I shared how you can automatically have your blog posts automatically feed into Facebook.com Notes so you could keep your Facebook.com site updated with fresh content.
Now, I would like to walk you through how to set up Facebook tabs that you could use for a Contact Form, a way to share News (separate from your blog), or even your own fan page where you could provide people who Like the page with a promotional coupon.
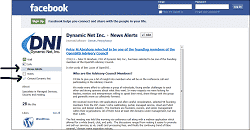
Visit http://www.facebook.com/dynamicnet.net to see what we’ve done to liven up Facebook so far.
The steps that follow make the following presumptions (prerequisites):
- You have a Facebook.com company page already set up (or will have it set up shortly.
- You have the appropriate user rights within WordPress to install a plugin, and adjust its settings.
- You already have a contact form on your WordPress site.
- You are comfortable creating and editing pages or posts within WordPress.
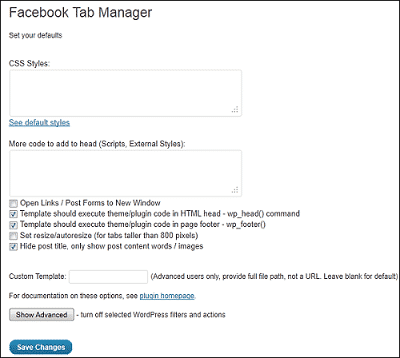
Let’s start off by your logging into your WordPress back end. Go to Plugins, Add New, and Search for Facebook Tab Manager by David F. Carr, and install / activate it. Below are the settings I’ve found to work best. With one of the beauties of WordPress is that you can try something new, and if you don’t like it, try something else. So experiment, and have fun trying to see what different settings do for your needs.
Once activated, you will have a new menu option within your administrator bar called Facebook Tabs. In that section, you will find you can see existing tabs you’ve created, add new Facebook tabs, read the documentation for the plugin, and go through the Reveal Tab setup (where you can set up what visitors see based on whether they have Liked the page or not.
Now let’s see how this works by going through creating a contact form you will have in WordPress.
First, go to your existing contact form and edit it so you can copy the code. This might be short code (that’s what it is for our site since we use Gravity Forms), or it might be HTML or a combination of both. Once you have it copied, let’s add a new Facebook tab.
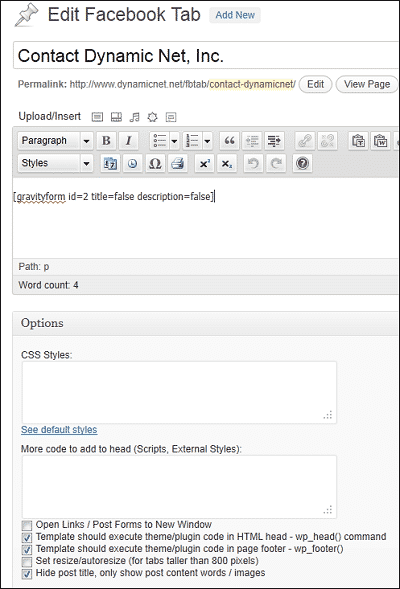
This is just like adding a new page or new post. Give it a meaningful title, and past in the code you copied from your contact form into the visual editor (if HTML, switch to HTML view first).
Since a picture can be worth a thousand words, here’s what our Facebook tab for our contact form looks like in WordPress:
Now, click publish and you will get instructions on that same page. To save you some headaches (since at the time of this writing the “Example Configuration” doesn’t match up correctly with Facebook.com’s current setup), please let me walk you through what to do next.
Your next step is to register to be a Facebook.com developer. After you register, you want to click on the “+ Create New Application” button in the upper right hand corner of the https://developers.facebook.com/apps/ page.
Give your application a meaningful name, review the terms, and check that you’ve read and accepted the terms of service.
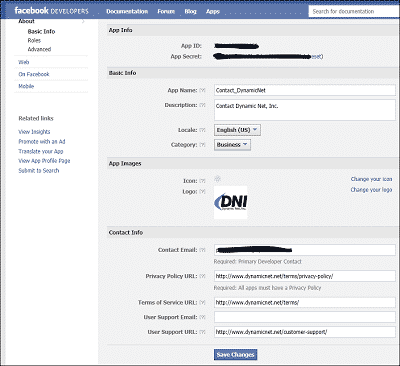
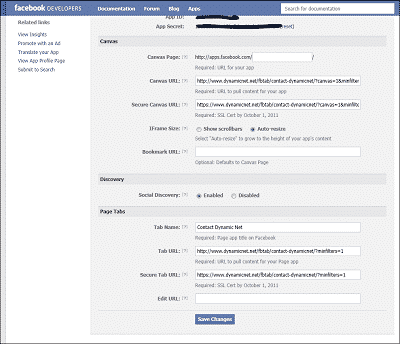
In your application, you are going to focus on filling in the following areas:
Basic Info
Application Name – a meaningful name that should match entered when you created the application.
Application Description – a meaningful description
Logo – upload your logo; it should be no more than 75 pixels by 75 pixels.
Contact Email – your contact email
Privacy Policy URL – a link to your privacy policy
Terms of Service (yours) URL – a link to your terms of service
Support email or URL – fill in either box (but not both) with either your support email address or support URL.
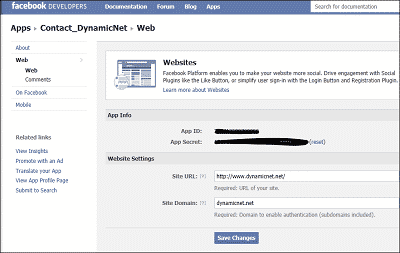
Web
Site URL – the URL to your site
Site Domain – just your domain name without any www. or other machine name prefix.
On Facebook
Canvas URL – you get this from the Facebook tab page you published
Secure Canvas URL – you get this from the Facebook tab page you published
Tab Name – you get this from the Facebook tab page you published
Tab URL – you get this from the Facebook tab page you published
Secure Tab URL – you get this from the Facebook tab page you published
Save changes as you go through each area.
Next, on the related links menu on the left, click on the View App Profile Page link.
Then click on the Add to My Page link to add the application to your business page.
Lastly, on your Facebook business page, you can edit the tab area to drag and drop tabs; and you should always test your Facebook tab application to see that it is working to your satisfaction.
Visit the Facebook Tab Manager plugin home page for more information about what you an do with this WordPress plugin.
